H
Hattie Grigsby
Guest
- Thread Author
- #1
Not every herb likes the same treatment. Woody herbs such as rosemary, thyme, oregano, and sage dry beautifully. Hang small bundles somewhere warm and airy, and they keep their flavor for months.
Soft herbs such as basil, parsley, and chives lose much of their taste when dried. They freeze better, either chopped in ice cube trays or tucked into oil. The harvest matters as much as the method.
Cut herbs in the morning, after the dew has dried and before the day heats up. North Carolina’s humidity can ruin drying herbs with mold, so airflow is important. Pick the right method for each plant, and your kitchen will smell like the garden all winter.
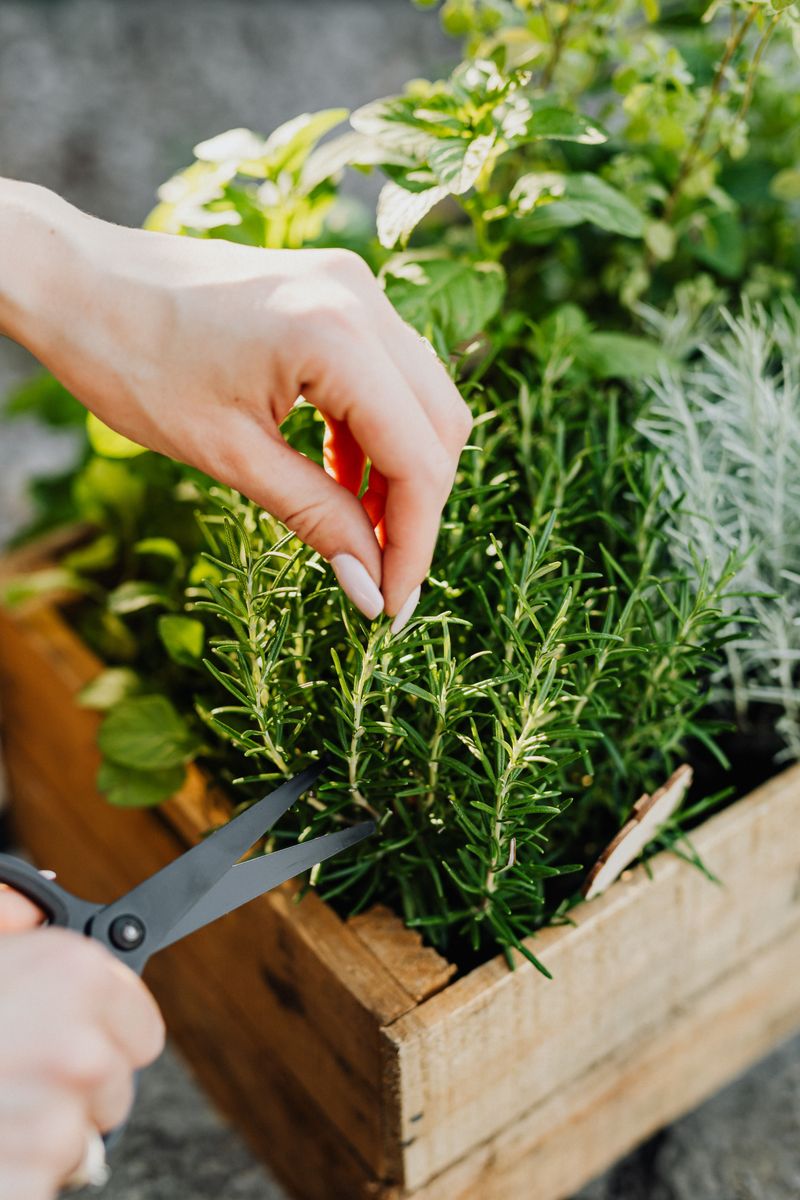
Image Credit: © https://kaboompics.com/ / Pexels
Great preserved herbs start long before the drying rack or freezer. They start with a good snip at the right moment. Timing really does change how your herbs will taste months from now.
Morning is the sweet spot. Herbs hold the most flavorful oils after the dew dries but before the afternoon heat sets in. Once the sun beats down, some of those tasty oils fade, so an early cut gives you the boldest flavor.
Plants also have a favorite stage. Leaves picked before the plant flowers usually pack the strongest taste. After blooms appear, many herbs send their energy into flowers and seeds, and the leaves can turn milder or even a little bitter.
Here is a simple routine to follow. Grab clean scissors or pruners and cut healthy, green stems once the leaves are dry. Skip any yellow, spotted, or bug-chewed pieces, since they will not get better in storage.
Should you wash them? Only rinse herbs if they look dirty or dusty. If you do rinse, pat them completely dry with a clean towel, because extra water can lead to mold or icy clumps later.
North Carolina weather adds one more twist. Tender herbs like basil hate cold, and even a chilly night in the 40s can turn the leaves dark and limp.
Keep an eye on the forecast and harvest basil before the first frost arrives, which often comes in October in the mountains and later near the coast.
Hardy herbs give you more breathing room. Rosemary, thyme, sage, and oregano can often be picked well into late fall, so focus on the tender ones first.
© Mahoney’s Garden Center
Not every herb wants the same treatment. Think of your harvest like a group of friends with different tastes. Some love a warm, dry room, while others feel much happier tucked into the cold.
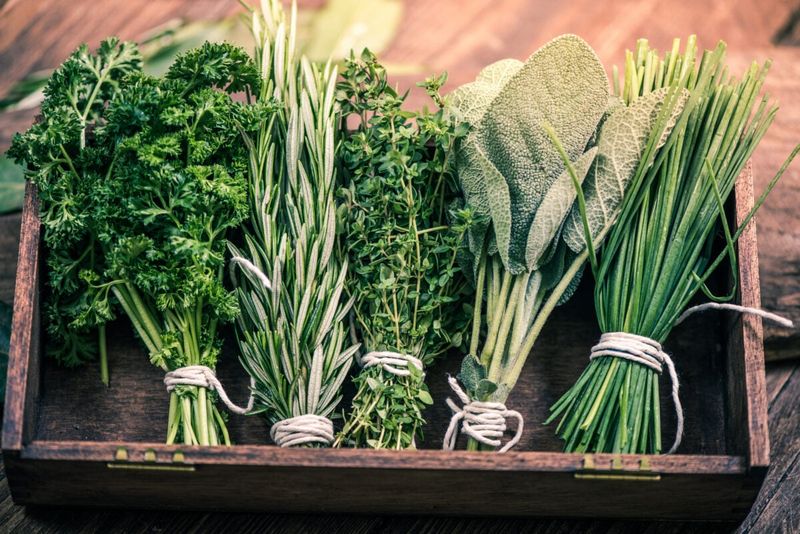
Sturdy herbs are the easy keepers. Rosemary, thyme, sage, oregano, and bay have tough leaves and strong oils, so they hold their flavor well when dried. Many cooks even say dried bay and oregano taste just as good as fresh in a pot of beans or chili.
Tender herbs are a different story. Basil, parsley, cilantro, chives, and dill have soft, thin leaves full of water. When they dry, much of their bright flavor slips away, leaving something that tastes a bit like hay.
Freezing saves the day for those delicate greens. Cold locks in their fresh taste far better than drying does. Your winter pesto will thank you.
Before you start any project, take a few minutes to sort. Lay your herbs out on the counter and make two piles, one for drying and one for freezing. Planning ahead keeps you from wasting time and helps every herb land in the method that suits it best.
Mixed piles can cause headaches. If you toss basil in with rosemary to dry, the basil may turn brown and bland while the rosemary does great.
For North Carolina gardeners, getting this right means a lot. Our long growing season often leaves us with huge harvests of both types.
Choosing the right method means better-tasting meals all winter, from Sunday stews to holiday stuffing, without any disappointing jars hiding in the back of the cupboard.
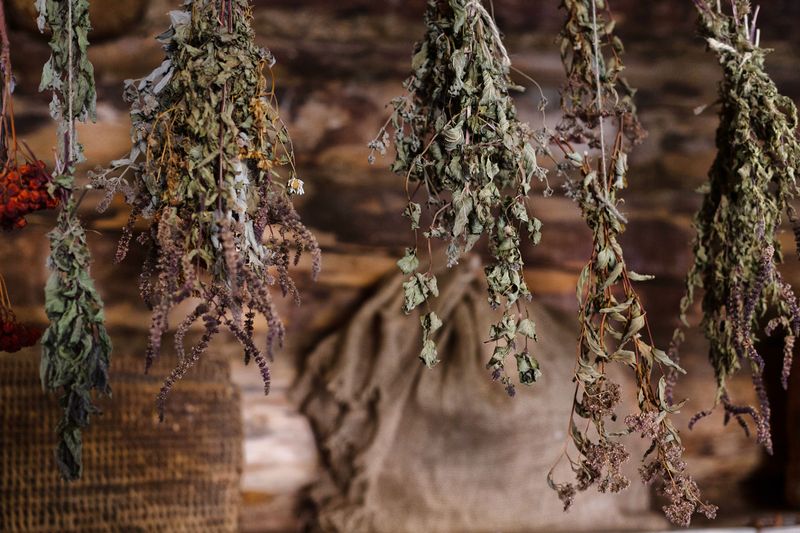
Image Credit: © Plato Terentev / Pexels
Grandma probably did it this way, and for good reason. Hanging herbs to dry is one of the oldest and cheapest tricks around. All you need is string, a hook, and a little patience.
Small bundles work best. When stems hang in loose bunches, air can move around every leaf so they dry evenly. Big, tight bundles trap moisture in the middle, and that is where trouble starts.
Gather five to ten stems and tie them together with string or a rubber band. Rubber bands are handy because they shrink along with the stems and keep a good grip. Then hang each bundle upside down.
Location matters a lot. Pick a warm, dry, dark spot with good airflow, such as a spare closet, pantry, or quiet corner away from the stove. Sunlight may seem helpful, but it actually fades the color and flavor of your herbs.
Want to keep things tidy? Slip a paper bag with a few holes poked in it over each bundle. It catches falling leaves and blocks dust, while the holes let air pass through.
Check your herbs every few days. They are ready when the leaves crumble easily between your fingers, which often takes one to two weeks.
Humidity is the big challenge in North Carolina. Our damp fall air can slow drying and sometimes lead to mold, especially near the coast.
Choose the driest room in your home, maybe one with air conditioning or a dehumidifier running. If you spot fuzzy spots or smell something musty, toss that bundle and try a drier space.
© Roots and Refuge Farm
Sticky weather and drying herbs do not mix well. Anyone who has lived through a muggy Carolina October knows the air can feel damp for days. A food dehydrator solves that problem in a single afternoon.
Speed is the big win. A dehydrator uses gentle, steady heat and a fan to move air across the leaves. Instead of waiting weeks, your herbs can be ready in a few hours.
Faster drying brings more perks. Less time sitting around means less chance for mold to grow. It also helps herbs keep more of their green color and rich flavor.
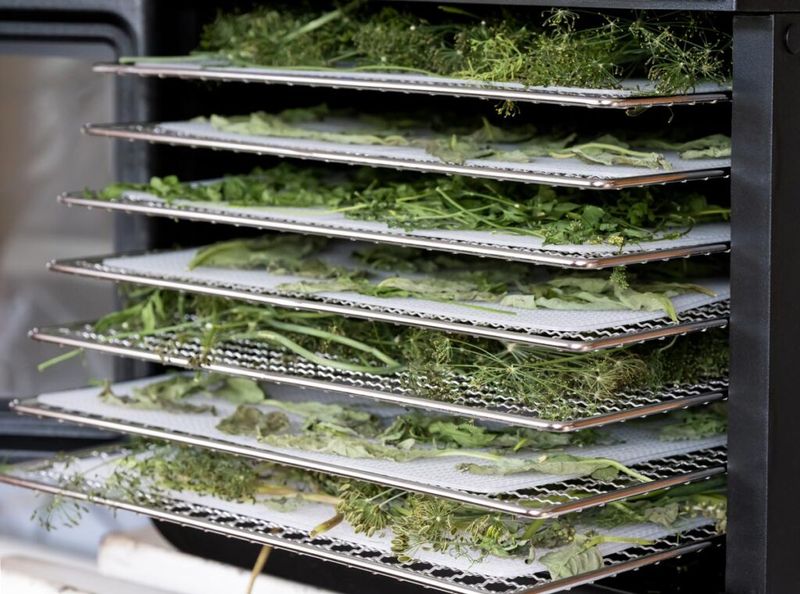
Getting started is easy. Spread the leaves in a single layer on the trays, without piling them up. Leaves that overlap dry slowly and unevenly, so give each one a little space.
Heat level is the next step. Set the dehydrator to a low temperature meant for herbs, usually around 95 to 115°F. Higher heat might seem quicker, but it can cook away the oils that give herbs their flavor.
Keep an eye on things. Check every hour or so, since thin leaves like oregano may finish faster than thick sage. The herbs are done when they crumble easily when touched.
Small leaves can sometimes slip through tray gaps. A mesh liner or a piece of parchment with a few slits works nicely to catch them.
For North Carolina gardeners, a dehydrator can be a smart buy. Humid fall weather often makes air drying slow and unreliable. With this handy tool, you control the results no matter what the sky is doing outside.
© Homestead and Chill
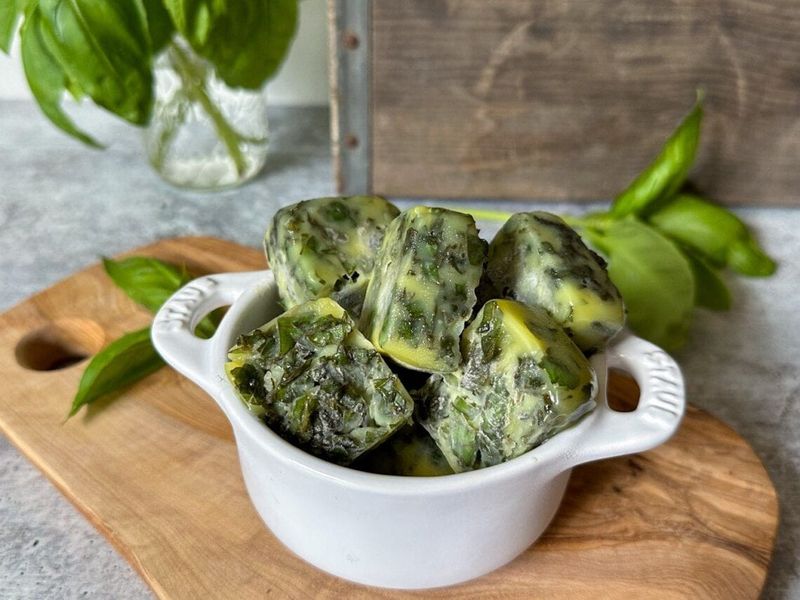
Imagine tossing a little green cube into a pot of winter soup and smelling summer basil rise from the steam. Herb cubes make that happen. They are one of the most useful things you can stash in your freezer.
Freezing locks in the fresh flavor of herbs like basil, parsley, and cilantro. Packing them in oil or water adds extra protection. The liquid surrounds each bit of leaf, which helps guard its color and texture from the harsh cold air.
Start by chopping your clean, dry herbs into small pieces. Pack them into ice cube trays, filling each spot about two-thirds full. Then pour olive oil or water over the top until the herbs are covered.
Which liquid should you use? Oil works wonderfully for sauces, pasta, and sautéed veggies. Water is a nice choice for soups and broths, where extra fat is not needed.
Slide the trays into the freezer until the cubes are solid. Pop them out and move them into freezer bags labeled with the herb name and date. Your trays are then free for the next batch.
One safety rule really matters. Keep herb and oil mixtures frozen or in the refrigerator, never sitting at room temperature. Herbs stored in oil on the counter can allow harmful bacteria to grow, so treat these cubes like any other frozen food.
North Carolina cooks will love this trick on chilly nights. Drop a cube straight into Brunswick stew, tomato sauce, or a pot of vegetable soup. No thawing needed, and dinner tastes like it came straight from the garden.
© RecipeToDo
Ever pulled a frozen bag of herbs out and found one giant green brick? Flash freezing fixes that frustrating moment. It keeps every leaf separate, so you grab only what you need.
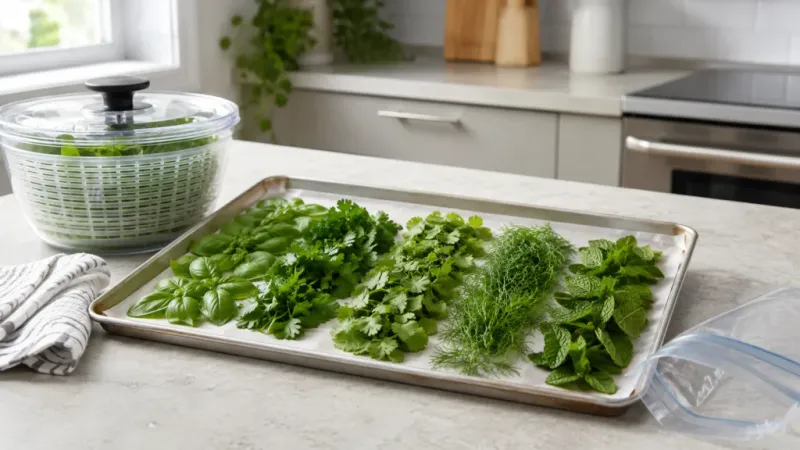
The idea is simple. When leaves freeze one by one on a flat tray, they stay loose instead of sticking together. Later, you can shake out a pinch of chives or a handful of parsley without hacking at a frozen lump.
Begin with clean, completely dry herbs. Any leftover water will turn into ice crystals, so give them a good pat with a towel first. You can keep leaves whole or chop them, depending on how you plan to cook.
Next, grab a baking sheet. Line it with parchment paper if you like, then spread the herbs out in a single layer. Make sure pieces are not piled on each other.
Pop the tray in the freezer for an hour or two, until the herbs feel firm. Then move them quickly into labeled freezer bags or containers. Press out as much air as you can before sealing, since air is what leads to freezer burn.
Work fast during this step. Frozen herbs thaw quickly on a warm counter, and you want them to stay loose. For North Carolina gardeners, this method is a real winner.
It works great for chives, parsley, dill, and other herbs used in small amounts. Sprinkle frozen chives on baked potatoes, toss dill into a pot of shrimp and grits, or brighten scrambled eggs with parsley on a frosty morning.
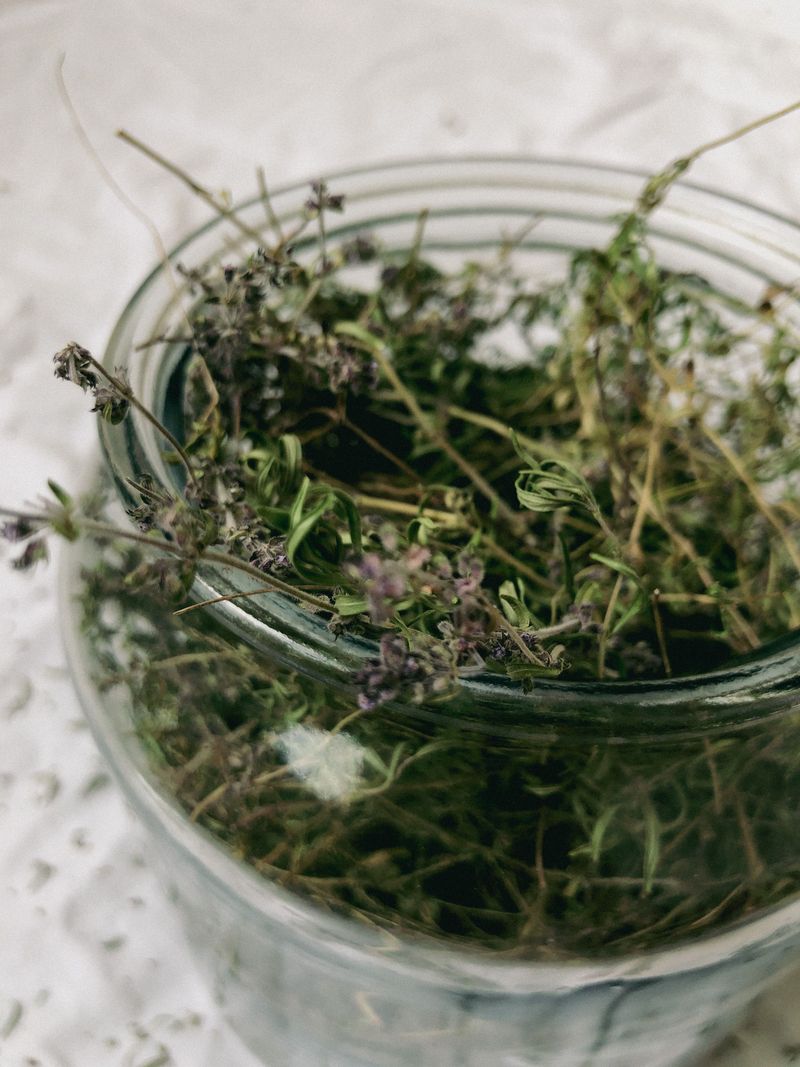
Image Credit: © Ekaterina Lifirenko / Pexels
All that snipping, drying, and freezing pays off only if your herbs stay tasty. Storage is the final step, and it might be the most overlooked one. A few smart habits can keep flavor strong for months.
Dried herbs have four enemies: light, heat, air, and moisture. Each one slowly steals flavor and color. Frozen herbs face their own problem, since poor sealing can lead to dry, faded freezer burn.
For dried herbs, make sure they are fully dry before storing. Even a little leftover moisture can cause mold inside the jar. If the leaves still bend instead of crumble, give them more time.
Keep leaves whole whenever you can. Place them in airtight glass jars and tuck the jars in a cool, dark cupboard away from the stove. Whole leaves hold onto their oils much longer than crushed ones.
Crush them right before cooking. Rubbing dried leaves between your palms releases a burst of flavor and smell into your dish. It is a small step that makes a big difference.
Labels save so much guessing. Write the herb name and the date on every jar and freezer bag. Dried oregano and dried marjoram look nearly the same, and nobody remembers which bag of green bits is dill.
Plan to use both dried and frozen herbs within about a year. They will not go bad overnight, but the flavor slowly fades after that.
In North Carolina, a tight seal matters even more. Our sticky summers can sneak moisture into loose jars, so airtight lids protect your hard work until next year’s garden fills back up.
The post The Best Way To Dry And Freeze Your North Carolina Herbs Before Winter Sets In appeared first on Positivebloom.
Soft herbs such as basil, parsley, and chives lose much of their taste when dried. They freeze better, either chopped in ice cube trays or tucked into oil. The harvest matters as much as the method.
Cut herbs in the morning, after the dew has dried and before the day heats up. North Carolina’s humidity can ruin drying herbs with mold, so airflow is important. Pick the right method for each plant, and your kitchen will smell like the garden all winter.
1. Harvest Herbs At Their Peak
Image Credit: © https://kaboompics.com/ / Pexels
Great preserved herbs start long before the drying rack or freezer. They start with a good snip at the right moment. Timing really does change how your herbs will taste months from now.
Morning is the sweet spot. Herbs hold the most flavorful oils after the dew dries but before the afternoon heat sets in. Once the sun beats down, some of those tasty oils fade, so an early cut gives you the boldest flavor.
Plants also have a favorite stage. Leaves picked before the plant flowers usually pack the strongest taste. After blooms appear, many herbs send their energy into flowers and seeds, and the leaves can turn milder or even a little bitter.
Here is a simple routine to follow. Grab clean scissors or pruners and cut healthy, green stems once the leaves are dry. Skip any yellow, spotted, or bug-chewed pieces, since they will not get better in storage.
Should you wash them? Only rinse herbs if they look dirty or dusty. If you do rinse, pat them completely dry with a clean towel, because extra water can lead to mold or icy clumps later.
North Carolina weather adds one more twist. Tender herbs like basil hate cold, and even a chilly night in the 40s can turn the leaves dark and limp.
Keep an eye on the forecast and harvest basil before the first frost arrives, which often comes in October in the mountains and later near the coast.
Hardy herbs give you more breathing room. Rosemary, thyme, sage, and oregano can often be picked well into late fall, so focus on the tender ones first.
2. Dry Sturdy Herbs, Freeze Tender Ones
© Mahoney’s Garden Center
Not every herb wants the same treatment. Think of your harvest like a group of friends with different tastes. Some love a warm, dry room, while others feel much happier tucked into the cold.
Sturdy herbs are the easy keepers. Rosemary, thyme, sage, oregano, and bay have tough leaves and strong oils, so they hold their flavor well when dried. Many cooks even say dried bay and oregano taste just as good as fresh in a pot of beans or chili.
Tender herbs are a different story. Basil, parsley, cilantro, chives, and dill have soft, thin leaves full of water. When they dry, much of their bright flavor slips away, leaving something that tastes a bit like hay.
Freezing saves the day for those delicate greens. Cold locks in their fresh taste far better than drying does. Your winter pesto will thank you.
Before you start any project, take a few minutes to sort. Lay your herbs out on the counter and make two piles, one for drying and one for freezing. Planning ahead keeps you from wasting time and helps every herb land in the method that suits it best.
Mixed piles can cause headaches. If you toss basil in with rosemary to dry, the basil may turn brown and bland while the rosemary does great.
For North Carolina gardeners, getting this right means a lot. Our long growing season often leaves us with huge harvests of both types.
Choosing the right method means better-tasting meals all winter, from Sunday stews to holiday stuffing, without any disappointing jars hiding in the back of the cupboard.
3. Air Dry Bundles In A Dry, Airy Spot
Image Credit: © Plato Terentev / Pexels
Grandma probably did it this way, and for good reason. Hanging herbs to dry is one of the oldest and cheapest tricks around. All you need is string, a hook, and a little patience.
Small bundles work best. When stems hang in loose bunches, air can move around every leaf so they dry evenly. Big, tight bundles trap moisture in the middle, and that is where trouble starts.
Gather five to ten stems and tie them together with string or a rubber band. Rubber bands are handy because they shrink along with the stems and keep a good grip. Then hang each bundle upside down.
Location matters a lot. Pick a warm, dry, dark spot with good airflow, such as a spare closet, pantry, or quiet corner away from the stove. Sunlight may seem helpful, but it actually fades the color and flavor of your herbs.
Want to keep things tidy? Slip a paper bag with a few holes poked in it over each bundle. It catches falling leaves and blocks dust, while the holes let air pass through.
Check your herbs every few days. They are ready when the leaves crumble easily between your fingers, which often takes one to two weeks.
Humidity is the big challenge in North Carolina. Our damp fall air can slow drying and sometimes lead to mold, especially near the coast.
Choose the driest room in your home, maybe one with air conditioning or a dehumidifier running. If you spot fuzzy spots or smell something musty, toss that bundle and try a drier space.
4. Use A Dehydrator When The Air Is Humid
© Roots and Refuge Farm
Sticky weather and drying herbs do not mix well. Anyone who has lived through a muggy Carolina October knows the air can feel damp for days. A food dehydrator solves that problem in a single afternoon.
Speed is the big win. A dehydrator uses gentle, steady heat and a fan to move air across the leaves. Instead of waiting weeks, your herbs can be ready in a few hours.
Faster drying brings more perks. Less time sitting around means less chance for mold to grow. It also helps herbs keep more of their green color and rich flavor.
Getting started is easy. Spread the leaves in a single layer on the trays, without piling them up. Leaves that overlap dry slowly and unevenly, so give each one a little space.
Heat level is the next step. Set the dehydrator to a low temperature meant for herbs, usually around 95 to 115°F. Higher heat might seem quicker, but it can cook away the oils that give herbs their flavor.
Keep an eye on things. Check every hour or so, since thin leaves like oregano may finish faster than thick sage. The herbs are done when they crumble easily when touched.
Small leaves can sometimes slip through tray gaps. A mesh liner or a piece of parchment with a few slits works nicely to catch them.
For North Carolina gardeners, a dehydrator can be a smart buy. Humid fall weather often makes air drying slow and unreliable. With this handy tool, you control the results no matter what the sky is doing outside.
5. Freeze Tender Herbs In Oil Or Water
© Homestead and Chill
Imagine tossing a little green cube into a pot of winter soup and smelling summer basil rise from the steam. Herb cubes make that happen. They are one of the most useful things you can stash in your freezer.
Freezing locks in the fresh flavor of herbs like basil, parsley, and cilantro. Packing them in oil or water adds extra protection. The liquid surrounds each bit of leaf, which helps guard its color and texture from the harsh cold air.
Start by chopping your clean, dry herbs into small pieces. Pack them into ice cube trays, filling each spot about two-thirds full. Then pour olive oil or water over the top until the herbs are covered.
Which liquid should you use? Oil works wonderfully for sauces, pasta, and sautéed veggies. Water is a nice choice for soups and broths, where extra fat is not needed.
Slide the trays into the freezer until the cubes are solid. Pop them out and move them into freezer bags labeled with the herb name and date. Your trays are then free for the next batch.
One safety rule really matters. Keep herb and oil mixtures frozen or in the refrigerator, never sitting at room temperature. Herbs stored in oil on the counter can allow harmful bacteria to grow, so treat these cubes like any other frozen food.
North Carolina cooks will love this trick on chilly nights. Drop a cube straight into Brunswick stew, tomato sauce, or a pot of vegetable soup. No thawing needed, and dinner tastes like it came straight from the garden.
6. Flash Freeze Whole Leaves For Easy Use
© RecipeToDo
Ever pulled a frozen bag of herbs out and found one giant green brick? Flash freezing fixes that frustrating moment. It keeps every leaf separate, so you grab only what you need.
The idea is simple. When leaves freeze one by one on a flat tray, they stay loose instead of sticking together. Later, you can shake out a pinch of chives or a handful of parsley without hacking at a frozen lump.
Begin with clean, completely dry herbs. Any leftover water will turn into ice crystals, so give them a good pat with a towel first. You can keep leaves whole or chop them, depending on how you plan to cook.
Next, grab a baking sheet. Line it with parchment paper if you like, then spread the herbs out in a single layer. Make sure pieces are not piled on each other.
Pop the tray in the freezer for an hour or two, until the herbs feel firm. Then move them quickly into labeled freezer bags or containers. Press out as much air as you can before sealing, since air is what leads to freezer burn.
Work fast during this step. Frozen herbs thaw quickly on a warm counter, and you want them to stay loose. For North Carolina gardeners, this method is a real winner.
It works great for chives, parsley, dill, and other herbs used in small amounts. Sprinkle frozen chives on baked potatoes, toss dill into a pot of shrimp and grits, or brighten scrambled eggs with parsley on a frosty morning.
7. Store Preserved Herbs Properly
Image Credit: © Ekaterina Lifirenko / Pexels
All that snipping, drying, and freezing pays off only if your herbs stay tasty. Storage is the final step, and it might be the most overlooked one. A few smart habits can keep flavor strong for months.
Dried herbs have four enemies: light, heat, air, and moisture. Each one slowly steals flavor and color. Frozen herbs face their own problem, since poor sealing can lead to dry, faded freezer burn.
For dried herbs, make sure they are fully dry before storing. Even a little leftover moisture can cause mold inside the jar. If the leaves still bend instead of crumble, give them more time.
Keep leaves whole whenever you can. Place them in airtight glass jars and tuck the jars in a cool, dark cupboard away from the stove. Whole leaves hold onto their oils much longer than crushed ones.
Crush them right before cooking. Rubbing dried leaves between your palms releases a burst of flavor and smell into your dish. It is a small step that makes a big difference.
Labels save so much guessing. Write the herb name and the date on every jar and freezer bag. Dried oregano and dried marjoram look nearly the same, and nobody remembers which bag of green bits is dill.
Plan to use both dried and frozen herbs within about a year. They will not go bad overnight, but the flavor slowly fades after that.
In North Carolina, a tight seal matters even more. Our sticky summers can sneak moisture into loose jars, so airtight lids protect your hard work until next year’s garden fills back up.
The post The Best Way To Dry And Freeze Your North Carolina Herbs Before Winter Sets In appeared first on Positivebloom.